Typing Pal’s School Edition provides a simple, effective and fun way to teach how to type. The training activities and management interface are tailor-made for schools. There are many ways to adapt the educational program and customize your students’ experience. But with such a wealth of management options, those new to the program may feel a bit overwhelmed at first. Not to worry! This series of articles shows you the first steps you need to take to set up Typing Pal.
SERIES — Getting Started With Typing Pal — School Edition
- Setting Up Typing Pal as an Administrator
- Setting Up Typing Pal as a Teacher
- Overseeing the Typing Pal Training Program
This article is for people who hold the teacher role in Typing Pal.
If your school uses provisioning with ClassLink, read the documentation instead.
How to Get Started
You should have received an email from Typing Pal with your login information and an invitation to select a new password. After completing this step, you will get to Typing Pal’s management interface. To log in again, use your school’s custom URL included in the email (for example, https://mapleridgeschool.typingpal.com).
The next steps depend on what is included in your Groups and Students tabs. Which situation applies to you?
-
I already have a group and students assigned to me. The accounts have been created for you. All you need to do is configure your group and provide your students with their login information.
-
I have a group assigned to me but no students. Start by configuring your group, then create student accounts and provide students with their login information.
-
There are no groups or students in my management interface. Start by creating a group, then create student accounts and provide students with their login information.
You’ll see, it’s as easy as ABC!
Note — Teachers are granted most of the management permissions for their groups and students by default. However, some permissions may be restricted depending on the school. If that is the case, ask the person holding the school administrator role for help.
Adding a Group
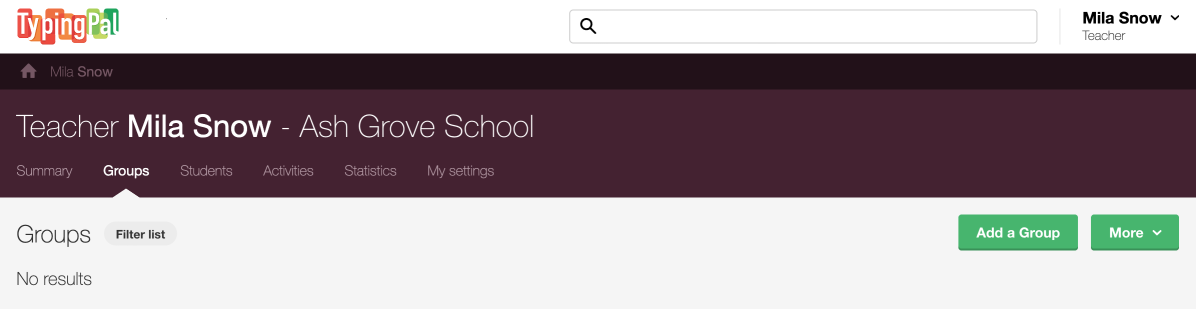
Before you can create student accounts, you must add a group. Go to the Groups (1) tab in the management interface and click the Add a Group button (2).
-
 12
12
Name your group and write a description if needed. Then, configure the basic settings in the form. This will define your students’ Typing Pal experience.
- Age group
Select the one that corresponds to your group: ages 6–11, ages 12–16, ages 17 and older. It determines the appearance of the student interface (characters, animations, etc.), the length of texts and the difficulty of activities. - Targets
Select the unit of speed measurement you prefer (words or characters per minute) and the speed and accuracy targets. Take a look at the recommended targets to make informed choices for your group. - Permissions
Check the boxes to enable your students to change their password and speed target. - Assigned teacher
If you share responsibility for the group, assign other teacher accounts in this section. Since you are creating the group, you are the main teacher. - Advanced settings
This optional section lets you set a practice text collection for the group and post a welcome message in the student’s interface.
When you are done, click Add.

Note that you can adjust these settings after creating the group. Discover even more settings in the Group Management section of the User Guide.
Since you already configured your group when you created it, skip the next section and go to the Creating Student Accounts section.
Configuring a Group
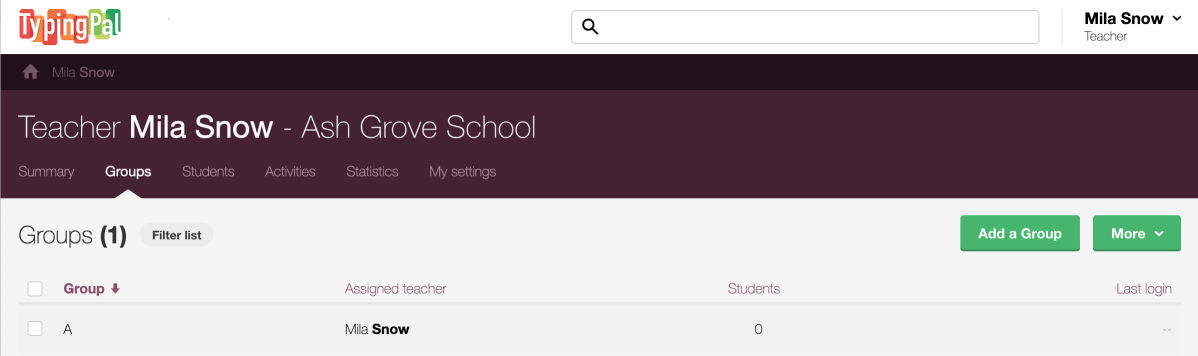
Go to the Groups tab (1) in the management interface and click the name of the group (2) to access its summary.
-
 12
12
The basic settings below should be configured before you start using Typing Pal in class. Note that you can adjust them at any time. Discover even more settings in the Group Management section of the User Guide.
General Information
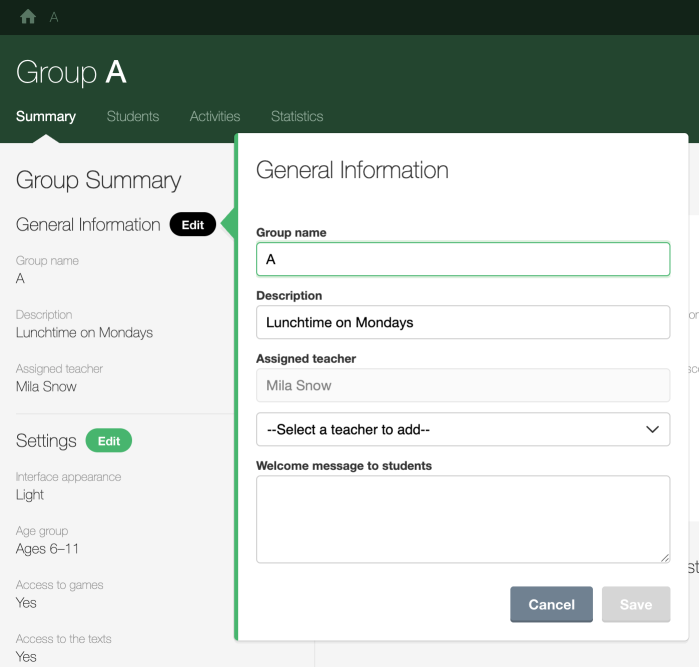
- Group name
- Description (optional)
- Assigned teacher
If needed, click the Edit button to make changes.
In this section, you also have the option to include a welcome message that will appear when your students first log in.
Settings
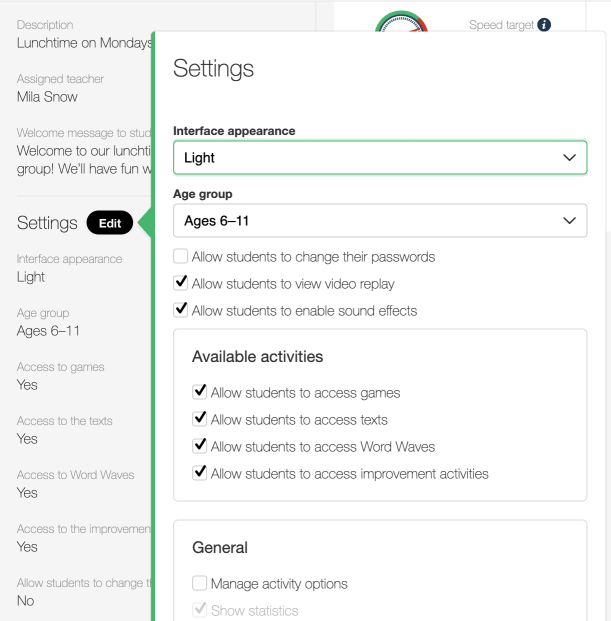
The Settings section has many options that define your students’ Typing Pal experience. Here are the main ones.
- Age group
Select the one that corresponds to your group: ages 6–11, ages 12–16, ages 17 and older. It determines the appearance of the student interface (characters, animations, etc.), the length of texts and the difficulty of activities. - Allow students to change their passwords
Leave the box unchecked if you want to manage passwords yourself. - Available activities
In this section, check or uncheck the boxes to grant students access to the games, texts, Word Waves and improvement activities. This setting is useful if you want your students to focus solely on learning exercises at first or to save certain activities for a specific time as a reward. - General
This section includes the display options for activities. Do not check the first box if you want your students to adjust the settings according to their preferences. If you would rather manage these settings yourself, read more about the display options for activities in the User Guide, then check the first box to configure the settings.
Targets
Select the unit of speed measurement you prefer (words or characters per minute) and the group’s speed and accuracy targets in the Targets tile at the center. The graphics can help you choose the right targets for your group.
Now that you have configured your group, start adding students!
Creating Student Accounts
You can either create accounts manually or ask your students to create their own accounts.
Self-Registration
Save valuable time by asking students to create their own account. Provide them with the school’s custom URL and signup code. Students can then create their account by entering their name, choosing their username and password, and selecting their teacher and group.
Manually
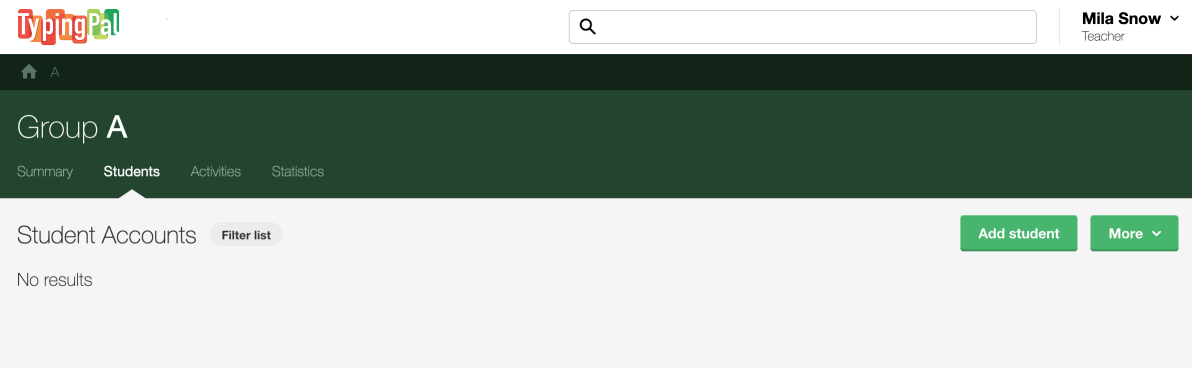
If you only need to add a handful of students, you can create their accounts manually.
- Go to the Students tab.
- Click the Add student button.
-
 12
12
-
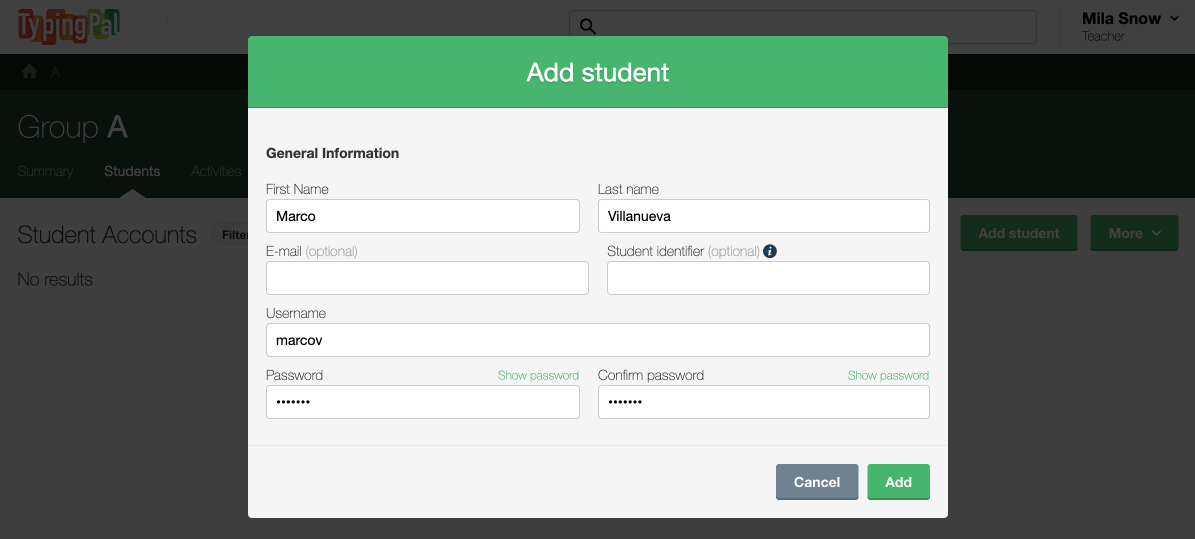
Fill in the required fields in the new window.
• You must choose each student’s username and password.
• The student identifier is optional but can be useful to link the account to the identifier used in your school’s management system. -
Click Add.
-
 34
34
Check out the Student Management chapter in the User Guide to learn more.
All that’s left is providing students with their login information!
Sharing Login Information
Start by inviting your students to go to Typing Pal’s login page using the school’s custom URL.
If you created accounts manually, provide each student with the username and password you chose when creating their account. If you opted for self-registraton, students already know their username and password, as they chose them themselves.
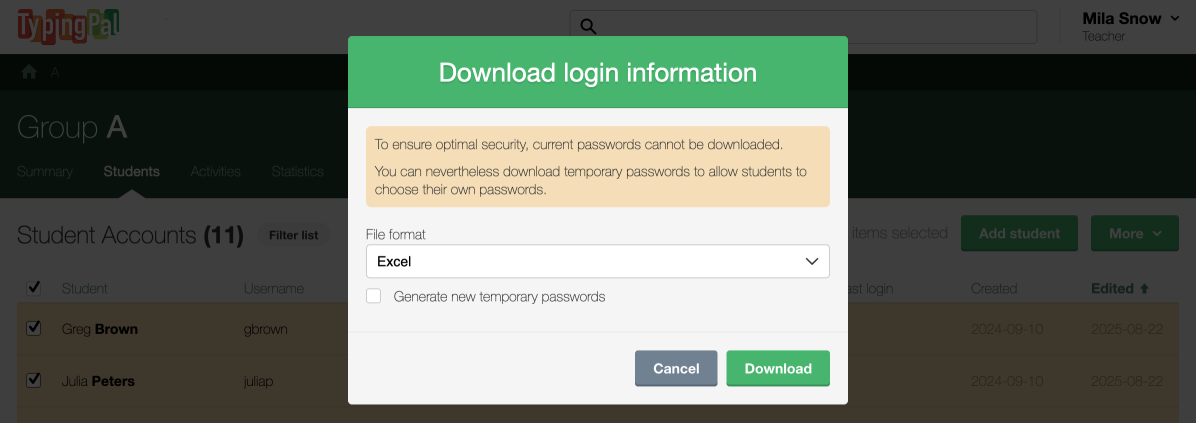
Using Temporary Passwords
Whichever option you choose, we recommend that you provide students with a temporary password generated by Typing Pal. Passwords currently in use cannot be downloaded for security reasons.
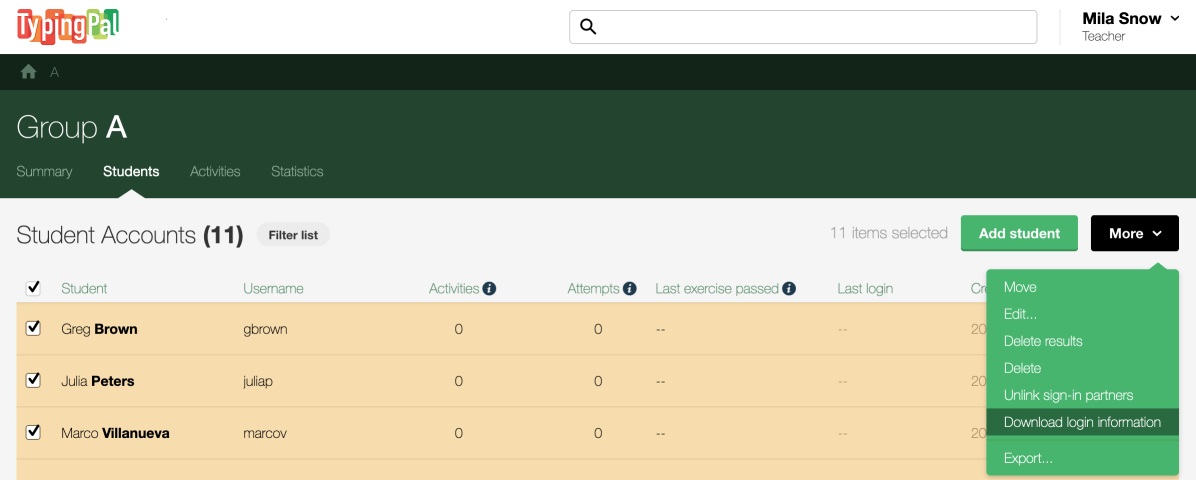
- Go to the Students tab.
- Check the individual students with whom you want to share login information, or the entire list.
- Click the More menu and select Download login information.
-
 123
123
- Select Excel or CSV from the File format drop-down menu.
- Click Download.
-
 45
45
The following columns will appear in the downloaded file.

Provide each student with their username and temporary password. Temporary passwords remain valid for 10 days.
Students will be prompted to choose a new password the first time they log in. To enhance security, do not choose one for them. Recommend that they create one consisting of at least three words or of a short sentence (without spaces) they can easily remember. It is length rather than complexity that makes a strong password.
🎉 That’s it! Your students can now log in to their account and start exploring Typing Pal.
We hope you found this walkthrough useful. We have only covered the basics of setting up Typing Pal, so check out the User Guide to learn more.


